Post
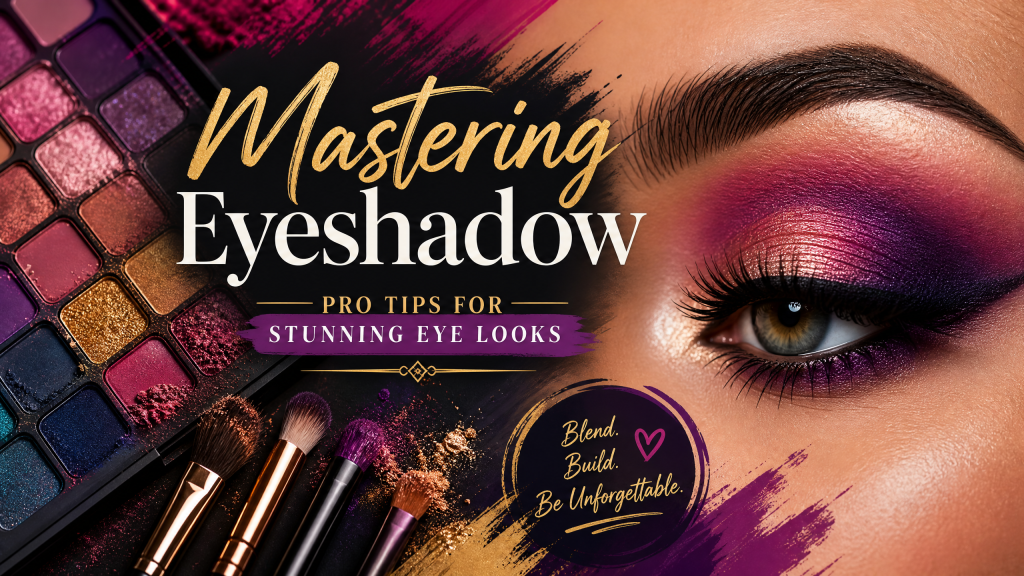
Mastering Eyeshadow: Pro Tips for Stunning Eye Looks
Jun
Mastering Eyeshadow: Pro Tips for Stunning Eye Looks
Eyeshadow isn’t just a cosmetic product; it’s a powerful tool for self-expression, capable of transforming your gaze, enhancing your features, and communicating your mood without a single word. From subtle daytime elegance to dramatic evening glamour, the possibilities are endless. Yet, for many, mastering eyeshadow application can feel like navigating a complex art form. Creasing, patchy color, or an inability to achieve that perfectly blended look are common frustrations that can deter even the most enthusiastic makeup lovers.
Fear not, aspiring makeup artists! This comprehensive guide is designed to demystify the art of eyeshadow. Whether you’re a complete beginner eager to learn the basics or an experienced enthusiast looking to refine your techniques, we’ll equip you with professional tips, insights into product selection, and practical advice to help you create stunning eye looks with confidence. Get ready to unlock your creative potential and make your eyes truly pop!
Unlocking the Benefits of Mastering Eyeshadow
Beyond simply adding color, becoming proficient in eyeshadow application offers a multitude of benefits that extend to both your appearance and your confidence. It’s an investment in your makeup skills that pays dividends in endless creative possibilities.
Enhances and Defines Eye Color
Choosing complementary eyeshadow shades can dramatically intensify your natural eye color, making blue eyes appear bluer, green eyes greener, and hazel eyes more vibrant. It’s like adding a spotlight to your most captivating feature.
Corrects and Balances Eye Shape
Eyeshadow isn’t just for adding beauty; it’s also a powerful tool for illusion. Strategic placement of light and dark shades can make small eyes appear larger, hooded eyes more open, and can even balance close-set or wide-set eyes, creating overall facial harmony.
Creates Depth and Dimension
Flat, one-dimensional eye makeup can look uninspired. Mastering the art of blending and layering different shades allows you to create shadows and highlights that give your eyes incredible depth, making them appear more captivating and alive.
Expresses Personality and Mood
Your eyes are often the first thing people notice, and eyeshadow allows you to convey a message. Whether you want to project sophistication with neutrals, playfulness with pastels, or daring confidence with bold, smoky hues, your eyeshadow can be a direct extension of your personality and current mood.
Boosts Confidence and Creativity
Successfully executing a beautiful eye look can be incredibly empowering. The process itself is a creative outlet, allowing you to experiment, learn, and grow. The resulting confidence from knowing you look your best is invaluable.
Versatility for Any Occasion
With a solid understanding of eyeshadow techniques, you can effortlessly transition your look from a subtle daytime office appropriate style to a dazzling evening event. The versatility means you’re always prepared to make an impression, no matter the setting.
The Foundation: Prepping Your Canvas for Eyeshadow Success
Before any pigment touches your eyelids, proper preparation is paramount. Think of your eyelid as a canvas; a well-prepped canvas ensures your masterpiece lasts longer, appears more vibrant, and blends seamlessly. Skipping this crucial step is a common mistake that leads to creasing, fading, and patchy application.
Priming for Perfection
An eyeshadow primer is non-negotiable for professional-looking results. It creates a smooth, even base for your eyeshadow, enhancing its longevity and preventing it from creasing or fading throughout the day. It also helps colors appear more vibrant and true to pan.
- **Application:** Apply a thin layer of primer evenly across your entire eyelid, from the lash line up to your brow bone.
- **Wait:** Allow the primer to set for a minute or two before applying any eyeshadow.
- **Choose Wisely:** Opt for a primer specifically designed for eyeshadow. Some even come with a slight tint to further even out skin tone.
Concealing and Setting
If you have any discoloration, veins, or redness on your eyelids, a light layer of concealer can work wonders to neutralize these areas, creating a perfectly blank slate for your eyeshadow. This ensures that the true color of your eyeshadow shows through without being altered by underlying skin tones.
- **Conceal:** Dab a small amount of lightweight concealer onto areas of discoloration and gently blend with your finger or a brush.
- **Set:** Lightly set the concealer (and even the primer if it feels tacky) with a translucent powder or a matte, flesh-toned eyeshadow. This prevents stickiness and makes blending easier, reducing the risk of skipping or dragging color.
Understanding Eyeshadow Formulas and Finishes
The world of eyeshadow is diverse, offering a plethora of formulas and finishes, each with its unique characteristics and ideal uses. Understanding these differences is key to choosing the right products for your desired look and mastering their application.
Eyeshadow Formulas: Powders, Creams, Liquids, Gels
Powder Eyeshadows
The most common and versatile formula. Powder eyeshadows are easy to blend, buildable, and come in an extensive range of colors and finishes. They are excellent for layering and creating complex looks.
Cream Eyeshadows
These offer intense color payoff and can be applied with fingers or a synthetic brush. They are great as a base to intensify powder shadows or for a quick, one-and-done look. However, they can crease if not set properly.
Liquid Eyeshadows
Often applied with a doe-foot applicator, liquid eyeshadows provide high impact color, metallic, or glitter finishes. They dry quickly, offering great longevity but require swift blending.
Gel Eyeshadows
Similar to creams but often with a more slippery, wet feel. Gels can be great for creating glossy looks or for providing a long-wearing, smudge-proof base for other shadows.
Eyeshadow Finishes: Mattes, Shimmers, Metallics, Satins, Glitters
Matte
Completely flat, without any shine. Mattes are essential for creating depth, definition, and are often used in the crease, outer V, or as a transition shade. They are universally flattering and ideal for professional or everyday looks.
Shimmer/Satin
These finishes have a subtle sheen, reflecting light gently. Shimmers are great for adding a soft glow to the lid or inner corner. Satins are a softer version of shimmer, often looking like a very fine pearl sheen.
Metallic
Highly reflective, mimicking the look of liquid metal. Metallics provide intense shine and are perfect for making a bold statement on the lid, especially for evening looks or photo opportunities.
Glitter
Contain noticeable particles of glitter for a sparkling, festive effect. Glitter eyeshadows can be loose or pressed and are best applied with a glitter glue or a tacky base to minimize fallout.
Mastering Application Techniques: A Step-by-Step Guide
With your canvas prepped and your understanding of formulas solidified, it’s time to dive into the core of eyeshadow artistry: application. This involves using the right tools and understanding where each shade should go for a harmonious and flattering look.
The Right Brushes for Every Job
Investing in a few quality brushes will dramatically improve your eyeshadow application. Each brush type serves a specific purpose:
- **Fluffy Blending Brush:** Essential for seamlessly diffusing harsh lines and merging colors. Look for soft, domed brushes.
- **Flat Shader Brush:** Used for packing intense color onto the lid. Its dense, flat bristles pick up and deposit pigment efficiently.
- **Pencil/Smudge Brush:** Ideal for precision work, smudging eyeliner, or applying shadow to the lower lash line and inner corner.
- **Angled Brush:** Perfect for creating sharp lines, applying gel liner, or filling in brows.
- **Small Detail Brush:** For fine-tuning, highlight placement, or inner corner pop.
Basic Application Zones: Lid, Crease, Outer V, Brow Bone, Inner Corner
Understanding these zones is fundamental to creating structured and dimensional eye looks:
- **Lid:** The main mobile part of your eyelid, from your lash line to your crease. This is where you typically apply your main color or a shimmery shade.
- **Crease:** The natural hollow above your eyelid, where your lid folds. This is crucial for adding depth and definition, usually with a matte transition shade.
- **Outer V:** The outer corner of your eye, forming a “V” shape between the upper lash line and the crease. This area is used for intensifying color and adding drama.
- **Brow Bone:** The area directly under your eyebrow. A light, often shimmery, shade here lifts and highlights the brow.
- **Inner Corner:** The innermost corner of your eye near the tear duct. A bright, shimmery shade here opens up the eye and adds a youthful sparkle.
Blending: The Golden Rule
Blending is arguably the most crucial step for professional-looking eyeshadow. Harsh lines are the enemy of a polished eye look. Always use a clean, fluffy brush and blend in small, circular motions or back-and-forth windshield wiper motions until all edges are diffused and colors seamlessly transition into each other. Remember, blend until you think you’re done, then blend a little more!
Layering for Depth and Intensity
Building up color gradually is key. Start with a light hand and build intensity by adding thin layers of product. This prevents patchy application and allows for greater control over the final look. Layering also involves applying different finishes – for example, a matte base in the crease topped with a shimmer on the lid.
Color Theory for Eyeshadow Artistry
Moving beyond basic application, understanding color theory can elevate your eyeshadow game from good to truly stunning. It’s not just about picking colors you like, but about understanding how they interact with each other and with your natural features.
Complementary Colors to Make Your Eyes Pop
Using colors opposite each other on the color wheel can make your eye color appear more intense and vibrant. This is a fundamental principle for truly making your eyes stand out.
- **Blue Eyes:** Warm shades like oranges, coppers, browns, and golds create a striking contrast.
- **Green Eyes:** Reds, purples, plums, and cranberry shades will make green eyes sparkle.
- **Brown Eyes:** Brown eyes are incredibly versatile. Blues, purples, greens, and even cool-toned grays can enhance them beautifully.
- **Hazel Eyes:** Depends on whether you want to bring out the green or brown tones. Purples and warm browns highlight green, while golds and coppers bring out amber.
Neutral vs. Bold: Choosing Your Palette
Your choice of palette often depends on the occasion and your desired statement. Neutrals (browns, taupes, creams, grays) are universally flattering, safe for everyday wear, and form the backbone of many versatile looks. Bold colors (vibrant blues, greens, purples, reds) are fantastic for making a statement, artistic looks, or special events. Don’t be afraid to combine them; a pop of bold color on a neutral base can be very effective.
Understanding Undertones
Just like skin, eyeshadows have undertones (warm, cool, or neutral). Warm shadows have yellow, red, or orange hints. Cool shadows have blue, purple, or green hints. Neutral shadows are balanced. Choosing eyeshadows with undertones that flatter your skin’s undertone can create a more harmonious and sophisticated look. Generally, warm-toned eyeshadows flatter cool skin tones, and cool-toned eyeshadows flatter warm skin tones, though experimentation is key!
Tailoring Looks for Different Eye Shapes
One of the most powerful aspects of eyeshadow is its ability to create illusions and enhance your unique eye shape. There’s no one-size-fits-all approach; understanding your eye shape allows you to apply techniques that truly flatter you.
Hooded Eyes
Characterized by an extra fold of skin that droops over the crease, making the lid appear smaller or hidden when the eyes are open.
- **Techniques:** Focus on creating definition above the natural crease. Extend shadow higher towards the brow bone. Use matte shades to create a “faux crease” above your natural one. Keep the lid bright with shimmer. Avoid heavy eyeliner on the upper lid.
Monolid Eyes
Monolid eyes typically lack a visible crease, giving the eyelid a flat surface.
- **Techniques:** Create dimension through blending gradients of color. Apply darker shades closer to the lash line and gradually blend lighter shades upwards. Focus on creating a smoky effect that lifts outwards. A winged liner can also be very flattering.
Almond Eyes
Considered the most versatile eye shape, almond eyes are oval with a slight upward tilt at the outer corner.
- **Techniques:** Almost any eyeshadow technique works well with almond eyes. You can enhance the natural shape with a classic smoky eye, winged liner, or cut crease. Focus on accentuating the outer V for a lifted effect.
Round Eyes
Round eyes appear more circular with the whites of the eyes visible above or below the iris.
- **Techniques:** Aim to elongate the eye. Extend darker eyeshadows outwards past the outer corner of your eye. Use a winged liner to draw the eye out horizontally. Avoid applying dark shadow only in the center of the lid, as this can make them appear rounder.
Close-Set vs. Wide-Set Eyes
- **Close-Set Eyes:** Eyes that are closer together. To create the illusion of wider-set eyes, apply lighter, shimmery shades to the inner corner and inner half of the lid, and darker shades to the outer corner, blending outwards. Avoid dark liner in the inner corner.
- **Wide-Set Eyes:** Eyes that are further apart. To make them appear closer, focus darker eyeshadows and liner on the inner corners of the eyes and blend outwards, keeping the outer corner lighter.
Troubleshooting Common Eyeshadow Challenges
Even with the best techniques, challenges can arise. Here’s how to tackle some common eyeshadow dilemmas like a pro.
Preventing Creasing
Creasing happens when oil and moisture from your eyelids cause eyeshadow to gather in the crease line.
- **Solution:** Always use an eyeshadow primer. For oily lids, set your primer with a translucent powder or a matte, flesh-toned eyeshadow before applying color. Opt for longer-wearing cream or liquid formulas as a base.
Dealing with Fallout
Fallout refers to eyeshadow particles that drop onto your cheekbones during application, especially with glittery or highly pigmented shadows.
- **Solution:** Tap off excess product from your brush before applying. Apply eyeshadow before your foundation and concealer, so you can easily wipe away fallout without disturbing your face makeup. Alternatively, “bake” your under-eye area with a thick layer of setting powder to catch fallout, then brush it away.
Achieving Symmetrical Looks
It’s common for one eye to look slightly different from the other due to natural facial asymmetry. Achieving perfect symmetry takes practice.
- **Solution:** Use a magnifying mirror. Work on both eyes simultaneously, applying a little product to one eye, then mirroring it on the other, rather than completing one eye entirely before moving to the next. The “tape trick” can also help create sharp, symmetrical lines at the outer corner.
Making Colors Pop
Sometimes, eyeshadows don’t appear as vibrant on the lid as they do in the pan.
- **Solution:** Apply a white or nude cream eyeshadow base before your colored shadow. This creates a neutral, opaque canvas. For shimmers and metallics, dampen your brush with setting spray before picking up the product for an intensified, foiled effect. Layering also helps; apply a matte shade in a similar color family first, then layer the shimmer on top.
The Ultimate Eyeshadow Buying Guide
With a deeper understanding of application, it’s time to talk about building your eyeshadow arsenal. The right products can make all the difference in achieving professional results and enjoying the application process.
What to Look For in a Palette or Single Eyeshadow
Pigmentation
High pigmentation means you get rich color payoff with minimal effort. Swatch shadows on your arm to test.
Blendability
The shadows should blend smoothly without looking patchy or muddy. Good blendability is crucial for seamless transitions.
Longevity
Look for formulas that claim long-wear or crease-resistance. Read reviews to see how they perform throughout the day.
Ingredients
If you have sensitive eyes, check for hypoallergenic or ophthalmologist-tested formulas. Avoid harsh chemicals if preferred.
Color Story
For palettes, assess if the color scheme suits your needs (e.g., neutrals for everyday, brights for fun). Do the shades complement each other?
Investing in Quality Brushes
While you don’t need dozens, a few high-quality brushes are a game-changer. They pick up and distribute product more effectively and last longer.
- **Synthetic vs. Natural:** Synthetic brushes are ideal for cream and liquid products, and are easier to clean. Natural hair brushes excel with powder products for soft, diffused blending.
- **Start with Essentials:** A good blending brush, a flat shader brush, and a pencil brush are excellent starting points.
Essential Complementary Products
- **Eyeshadow Primer:** As discussed, absolutely vital for longevity and vibrancy.
- **Makeup Remover:** A gentle yet effective eye makeup remover is necessary to avoid tugging at the delicate eye area.
- **Setting Spray:** A good setting spray can lock your entire makeup look in place, including eyeshadow.
- **Concealer:** To perfect your canvas and clean up any edges.
Budget vs. Splurge
The beauty market offers fantastic options at every price point. You can find excellent drugstore eyeshadows and brushes. However, some higher-end brands do offer superior pigmentation, blendability, and unique finishes. Invest in primer and a few good brushes, and then experiment with eyeshadows from various price ranges to find what works best for you.
Frequently Asked Questions About Eyeshadow
How do I make my eyeshadow last all day?
Always start with a good eyeshadow primer. Layer your products (e.g., cream base, then powder shadow). Set your finished eye look with a setting spray. For extremely oily eyelids, lightly dust translucent powder over your primer before applying color.
Can I use liquid lipstick as eyeshadow?
While some people do, it’s generally not recommended unless the product is specifically marketed as multi-use or eye-safe. Liquid lipsticks are formulated for lips and may contain ingredients that can irritate the sensitive eye area or cause dryness. Always check product labels.
What’s the best way to clean my eyeshadow brushes?
For daily maintenance, use a brush cleaner spray on a tissue. For a deep clean, wash brushes weekly with a gentle brush shampoo or baby shampoo and lukewarm water. Swirl the brush in your palm, rinse thoroughly, reshape, and lay flat to dry completely.
How do I choose the right colors for my skin tone?
While personal preference trumps all, generally:
- **Cool Undertones:** Silvers, grays, cool browns, blues, purples, emerald greens often look stunning.
- **Warm Undertones:** Golds, bronzes, warm browns, peaches, oranges, olive greens tend to flatter.
- **Neutral Undertones:** You can pull off both warm and cool shades beautifully!
However, the most important factor is often your eye color (as discussed in color theory) and what makes you feel good.
Is it okay to use old eyeshadow?
Eyeshadows, especially powders, generally have a longer shelf life (1-2 years) than liquid products. However, if you notice a change in texture, smell, or performance, or if you’ve had an eye infection, it’s best to discard them to prevent irritation or further infection. Always check the PAO (Period After Opening) symbol on the packaging.
What’s the difference between matte and shimmer eyeshadow?
Matte eyeshadows have no shine or sparkle; they absorb light and are used for definition, depth, and sculpting. Shimmer eyeshadows contain finely milled reflective particles, adding a soft sheen and reflecting light, making areas appear brighter or more prominent. They are used for highlights and adding vibrancy.
Conclusion: Your Journey to Eyeshadow Mastery
Embarking on the journey to master eyeshadow is an exciting venture that promises to unlock new levels of creativity and confidence in your makeup routine. We’ve covered everything from the foundational steps of preparing your eyelids and understanding diverse formulas, to mastering advanced application techniques, delving into the nuances of color theory, and tailoring looks to suit unique eye shapes. We’ve also armed you with troubleshooting tips and a comprehensive buying guide to help you navigate the vast world of eyeshadow products.
Remember, the true beauty of eyeshadow artistry lies in practice and experimentation. Don’t be afraid to try new colors, blend different finishes, or adapt techniques to make them your own. Each application is an opportunity to learn, refine, and discover what truly enhances your individual beauty. With the pro tips and guidance provided in this article, you now have the knowledge and tools to create stunning eye looks that not only turn heads but also express the unique, confident you.
So, grab your brushes, open your palettes, and let your creativity soar. The world of masterful eyeshadow awaits!